A site can look finished and still be unfit for handoff.
The homepage may match the design while the contact form routes to the wrong inbox. The mobile navigation may fail at one awkward width between tablet and phone. The analytics tag may load but never record the lead event the client cares about. The client may receive an Administrator account, open the editor, and discover that a normal content update breaks the layout.
That is the difference between a visual review and quality assurance.
A useful WordPress QA checklist does not ask, “Does the website look good?” It asks whether the agreed website works under realistic conditions, whether known defects have been classified, and whether the agency has enough evidence to say the project is ready for approval.
For agencies, this matters for another reason: client handoff changes who is responsible for the site. Once the client receives access, a vague QA process makes it difficult to separate an original defect from a later content edit, plugin update, hosting change, or new request.
The goal is not perfection. The goal is a controlled release.
What should agencies test before handing off a WordPress website?
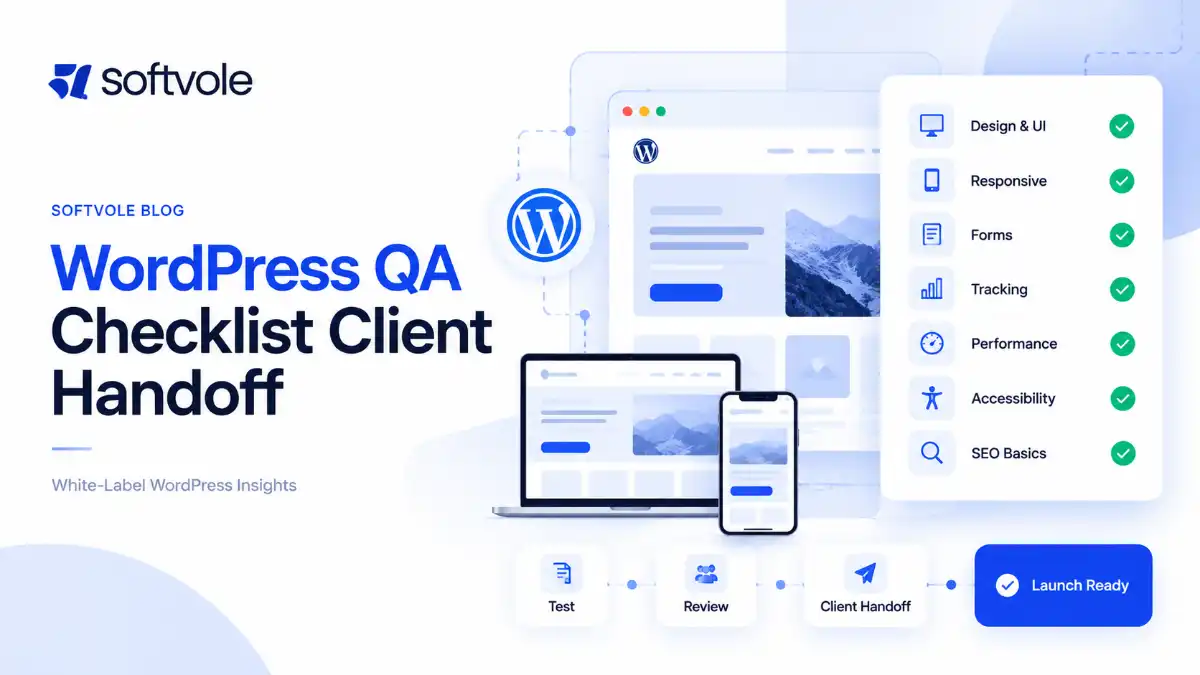
Before client handoff, agencies should verify nine areas:
- approved scope and final content;
- responsive layouts and browser behavior;
- navigation, links, forms, and critical user journeys;
- WordPress CMS editing and user permissions;
- SEO and production indexability;
- analytics, conversion tracking, and consent behavior;
- performance and page experience;
- accessibility checks appropriate to the agreed requirement;
- launch, ownership, backup, and handoff readiness.
WooCommerce, membership, booking, multilingual, and integration-heavy sites need additional project-specific tests.
The important part is not the number of checklist items. It is whether the tests reflect what the agency actually sold.
QA should start with the acceptance baseline, not with random clicking
The most useful QA reference is the approved project record.
That usually includes:
- signed scope;
- approved sitemap;
- approved desktop and responsive designs;
- content source;
- functional requirements;
- integration requirements;
- browser support policy;
- accessibility requirement, if any;
- tracking plan;
- migration requirements;
- agreed exclusions.
Without that baseline, QA can drift into subjective redesign.
A reviewer might say, “I think this section should have more spacing,” even though the implementation matches the approved design. That may be a valid design improvement, but it is not automatically a defect.
For agency operations, classify feedback into three buckets:
Defect: The build does not match an approved requirement or expected functional behavior.
Content correction: The implementation works, but text, media, or business information needs correction.
Change request: The requested outcome is new or materially different from the approved scope.
This distinction protects both the client and the production team.
Use three QA gates instead of one final checklist
A single pre-launch checklist often becomes too large and too late. A better model is to divide QA into three gates.
| QA gate | Main question | Typical environment | Owner |
|---|---|---|---|
| Gate 1: Build QA | Does the build match the approved scope? | Staging | Delivery / QA team |
| Gate 2: Production verification | Did launch change anything important? | Live domain | Technical owner |
| Gate 3: Handoff readiness | Can the client safely own and operate the site? | Live + admin | PM / account / delivery owner |
This framework prevents a common mistake: assuming that because staging passed, production must be fine.
DNS, SSL, caching, CDN behavior, live integrations, email routing, consent tools, analytics configuration, redirects, indexing rules, and environment-specific credentials can all behave differently after launch.
1. Confirm the final page inventory and approved content
Start with the simplest question: is the site complete?
Check the approved sitemap against the actual website.
Verify:
- all agreed pages exist;
- no staging-only pages are public;
- no test or duplicate pages remain;
- navigation reflects the final structure;
- footer links are complete;
- legal pages are linked where required;
- old temporary landing pages are removed or intentionally retained;
- unpublished pages are not accidentally linked;
- 404 behavior is intentional.
Then review visible content.
Check:
- page titles and headings;
- spelling;
- phone numbers;
- email addresses;
- office addresses;
- opening hours;
- pricing;
- testimonials;
- staff names and roles;
- copyright year;
- CTA wording;
- downloads;
- policy links;
- image captions;
- image crops.
Do not assume the client supplied data is correct. Your QA responsibility depends on scope, but the rendered website still deserves a final consistency check.
A useful rule is to test repeated information globally. If the same phone number appears in the header, footer, contact page, schema settings, and mobile CTA, verify all instances.
2. Test responsive layouts as a system, not as three screenshots
“Desktop, tablet, mobile checked” sounds complete until the layout breaks at 1180px.
Responsive QA should test the transitions between layouts, not only the preset breakpoints in a builder.
Review representative templates at several widths and drag the browser slowly through the range.
Look for:
- horizontal overflow;
- clipped text;
- headings wrapping badly;
- cards becoming uneven;
- buttons wrapping onto two lines;
- sticky elements covering content;
- menus changing state too early or too late;
- columns becoming too narrow;
- image crops losing important subject matter;
- sliders creating unexpected height;
- tables overflowing;
- forms becoming difficult to use;
- fixed-position CTAs covering controls;
- modals extending beyond the viewport.
Test content stress, not only ideal content
The cleanest Figma frame usually uses ideal copy.
Real content may be longer.
Test:
- long service titles;
- long blog titles;
- multi-line menu labels;
- long customer names;
- long product names;
- empty optional fields;
- missing featured images;
- unusually long form validation messages.
A layout that works only with perfect content is not robust.
Test orientation where it matters
For simple brochure sites, exhaustive orientation testing may not be worth the time.
For interactive dashboards, booking flows, ecommerce, tables, maps, and complex navigation, landscape mobile or tablet behavior can matter.
Your browser/device matrix should reflect project risk rather than a ceremonial list.
3. Define the browser matrix before QA begins
Do not promise “works on every browser.”
Define what the agency supports.
A sensible current policy for many B2B sites is to test the current stable versions of:
- Chrome;
- Safari;
- Firefox;
- Edge;
plus relevant iOS Safari and Android Chrome behavior.
The exact matrix should depend on the client’s audience, analytics history, contractual requirements, and feature complexity.
For each browser, test representative pages rather than manually repeating every page if the site uses shared templates.
Prioritize:
- header/navigation;
- homepage;
- one standard content page;
- each unique template;
- form-heavy pages;
- search/filter interfaces;
- ecommerce flows;
- pages with custom JavaScript;
- pages with complex animations.
Do not confuse responsive testing with browser testing
A site can be responsive in Chrome and still fail in Safari because of CSS, JavaScript, font, form-control, viewport, or sticky-position differences.
Both need coverage.
4. Test navigation and links as user journeys
Broken-link scanning is useful, but it does not replace navigation testing.
A link can return HTTP 200 and still send the user to the wrong place.
Test:
- header navigation;
- dropdowns and mega menus;
- mobile navigation;
- logo link;
- footer navigation;
- breadcrumb links;
- CTA buttons;
- inline links;
- cards that are meant to be clickable;
- social links;
- phone links;
- email links;
- download links;
- external links;
- pagination;
- previous/next links;
- search results;
- filter reset links.
Check whether external links should open in a new tab based on the site’s agreed convention. Do not apply target="_blank" automatically to everything.
Run critical journeys end to end
For a lead-generation site, a journey may be:
Homepage → Service → Case Study → Contact Form → Confirmation
For an ecommerce site:
Category → Product → Cart → Checkout → Payment → Order Confirmation
For a recruitment site:
Job Archive → Job Detail → Application → Confirmation
A page-level checklist can miss failures that only appear when several systems interact.
5. Test every form beyond “I got an email”
Forms are one of the most common places where a website appears functional while the actual workflow is broken.
Test each form for:
- required fields;
- optional fields;
- email format validation;
- phone validation where applicable;
- textarea limits if configured;
- file uploads;
- file type restrictions;
- file size restrictions;
- conditional logic;
- checkbox/radio behavior;
- consent fields;
- spam protection;
- success message;
- error message;
- redirect after submission;
- duplicate submission behavior;
- mobile keyboard usability;
- keyboard submission;
- CRM or automation handoff;
- admin notifications;
- user confirmation emails.
Then verify the actual destination.
If the requirement is “send leads to sales@company.com,” receiving a success message on the site is not enough.
Confirm that the message arrives.
If the form is connected to a CRM, verify that:
- the contact is created or updated;
- expected fields are populated;
- source data is correct;
- tags/lists/stages are applied;
- automation triggers when expected.
If failure handling exists, test that too.
A robust form test asks, “What happens when the integration does not respond?” not only “What happens when everything works?”
6. Test WordPress as the client will use it
This is one of the most under-tested parts of agency website QA.
A front-end site can pass visual QA while the CMS is frustrating or unsafe.
Create or use a client-level account with the same role the client will receive.
WordPress roles and capabilities determine what users can do, so QA should confirm the assigned role matches the handoff plan. WordPress documents the capability model for roles such as Administrator, Editor, Author, and others in its developer handbook.
Test common editing jobs:
- edit page copy;
- replace an image;
- add a blog post;
- change a featured image;
- update SEO metadata if included;
- create a new item in a custom post type;
- select taxonomy terms;
- reorder items if supported;
- save a draft;
- preview;
- publish;
- unpublish;
- recover from an accidental edit where revision history is available.
Verify structured fields
If the site uses ACF, SCF, native custom fields, WooCommerce fields, custom blocks, or another structured editing system, test:
- required fields;
- optional fields;
- validation;
- field labels;
- default values;
- conditional fields;
- empty-state behavior;
- image constraints;
- repeater limits;
- relationship fields;
- taxonomy selectors.
Ask a practical question:
Can a non-developer make a normal content update without breaking the intended layout?
If the answer is no, decide whether that is an intentional limitation that should be documented or a CMS problem that should be fixed.
Check admin clutter
Remove or hide unnecessary items where appropriate.
That may include:
- test plugins;
- temporary migration tools;
- unused themes;
- duplicate SEO plugins;
- abandoned page-builder add-ons;
- staging utilities;
- developer-only notices.
Do not remove something simply because the client does not recognize it. First confirm it is genuinely unused.
Review WordPress Site Health
WordPress includes Tools → Site Health, which surfaces critical issues, recommended improvements, and technical information about the installation.
Review it before handoff, but treat it as one diagnostic input rather than a complete QA system. Site Health can highlight configuration, update, PHP, plugin, and related issues, but it cannot validate your business workflows or visual implementation.
7. Verify search visibility and technical SEO on the production site
SEO QA should answer a basic question:
Can search engines access the correct production pages, and are the important signals aligned with the intended URLs?
Google’s technical guidance still starts with crawlability, indexability, useful content, and clear site structure. In 2026, Google also states that the same SEO fundamentals apply to AI Overviews and AI Mode. There is no special GEO schema, secret markup, or required AI text file for those features.
Before handoff, check:
- production site is not accidentally
noindex; - robots.txt is not unintentionally blocking important sections;
- staging is not indexable;
- canonical URLs point to the intended production URLs;
- HTTP redirects behave correctly;
- HTTPS is enforced;
- XML sitemap exists and references production URLs;
- sitemap excludes obvious test/staging URLs;
- page titles are present;
- meta descriptions are present where the SEO scope includes them;
- one clear primary H1 exists on important templates where appropriate;
- internal links point to production URLs;
- old URLs redirect correctly after redesign/migration;
- broken internal links are resolved;
- Search Console access/verification is handled if included;
- structured data matches visible content.
Test redirects individually where risk is high
A crawler can identify patterns, but migration QA should manually inspect important URLs:
- high-traffic pages;
- high-value landing pages;
- backlinks targets;
- old campaign URLs;
- product/category URLs;
- service pages;
- pages with changed slugs.
Do not redirect unrelated old URLs to the homepage simply to avoid 404s.
Do not optimize for an imaginary AI-only checklist
Google’s 2026 guidance is explicit: normal SEO fundamentals remain relevant for generative AI features in Search. Google also advises focusing on unique, useful, non-commodity content rather than scaled pages created primarily to manipulate rankings.
For agencies, that means the QA job is familiar: ensure the site can be crawled, indexed, understood, and used.
8. Verify analytics, conversion tracking, and consent behavior
Seeing Google Analytics in the page source is not proof that measurement works.
For Google Tag Manager implementations, Google provides Preview and Debug mode through Tag Assistant so teams can inspect which tags fire, in what order, and what data is being passed.
Test:
- base analytics pageviews;
- form submission events;
- lead events;
- phone click events;
- email click events if required;
- booking events;
- ecommerce events;
- purchase events;
- thank-you-page events;
- Google Ads conversion tags where included;
- Meta/LinkedIn/other advertising pixels where included;
- cross-domain tracking where relevant;
- referral exclusions where relevant.
For important GA4 events, use Realtime and/or DebugView to confirm that the expected event and parameters appear.
Test consent before and after choice
If the project includes a consent management platform or cookie banner, test behavior before and after user choice.
Check:
- banner displays where required;
- accept works;
- reject works;
- preferences work;
- consent state persists as intended;
- tags respect the configured consent logic;
- privacy/cookie links work;
- banner does not cover essential controls on mobile.
Do not make legal-compliance promises unless that responsibility is explicitly part of the engagement. QA can verify the implementation against approved requirements; legal advice belongs with qualified counsel.
9. Measure performance by representative templates, not homepage vanity
A homepage-only PageSpeed test can give a false sense of safety.
Test representative templates:
- homepage;
- standard content page;
- service page;
- blog archive;
- blog article;
- search/filter page;
- heavy landing page;
- product page;
- cart/checkout where relevant.
Google’s current Core Web Vitals are:
- Largest Contentful Paint (LCP): good at 2.5 seconds or less;
- Interaction to Next Paint (INP): good at 200 milliseconds or less;
- Cumulative Layout Shift (CLS): good at 0.1 or less;
measured at the 75th percentile for field data.
Those thresholds are useful targets, not a reason to chase a cosmetic “100” score at the expense of the project.
Google also says there is no single “page experience signal.” Core Web Vitals matter, but overall page experience includes mobile usability, secure delivery, intrusive interstitials, and whether users can easily access the main content.
Understand lab data versus field data
A newly launched website may not immediately have enough real-user field data for every URL.
In that case:
- use lab testing to catch obvious regressions;
- record a launch baseline;
- monitor field data later when available.
Do not present a single Lighthouse run as a permanent performance guarantee.
Look for obvious WordPress performance defects
Check for:
- oversized hero images;
- uncompressed images;
- missing dimensions causing layout shift;
- unnecessary autoplay video;
- excessive third-party scripts;
- duplicate tracking scripts;
- page-builder assets loaded unnecessarily;
- render-blocking assets;
- uncached pages where caching is expected;
- slow uncached server response;
- heavy sliders;
- animation that causes layout movement;
- webfont problems;
- plugin-related script duplication.
The exact performance budget should come from the project requirements.
10. Run accessibility QA against the agreed standard
Accessibility QA should not be reduced to “the scanner says 97.”
Automated tools are useful for finding certain classes of issue, but manual interaction still matters.
If the project requires WCAG 2.2 Level AA, say that explicitly in the scope and test plan. W3C’s WCAG 2.2 includes requirements around keyboard access, visible focus, headings and labels, text alternatives, contrast, forms, and other user needs.
At minimum, review:
- keyboard navigation;
- visible keyboard focus;
- focus order;
- focus not being hidden by sticky elements;
- skip links where required by the design/standard;
- form labels;
- validation messages;
- semantic headings;
- button versus link semantics;
- image alt text;
- decorative-image handling;
- color contrast;
- zoom / larger text behavior;
- menu accessibility;
- modal focus behavior;
- carousel controls;
- video captions/transcripts where in scope.
Test keyboard behavior manually
Use Tab, Shift+Tab, Enter, Space, Escape, and arrow keys where the component pattern expects them.
Ask:
- Can every interactive feature be reached?
- Is the focus indicator visible?
- Is focus trapped appropriately inside a modal?
- Can the user close menus and dialogs without a mouse?
- Does a sticky header or cookie bar obscure the focused element?
W3C specifically identifies keyboard operability and visible focus as important accessibility requirements.
Be careful with compliance language
If your team has only run automated scans and a quick keyboard pass, do not claim full WCAG conformance unless the engagement and testing methodology genuinely support that statement.
Define what was tested.
11. Test error states and empty states
Happy-path testing is not enough.
Test what happens when:
- a required form field is empty;
- an invalid email is entered;
- a search returns zero results;
- a filter produces no matches;
- a custom post type has no entries;
- a featured image is missing;
- an API returns no data;
- a user opens an expired link;
- a product is out of stock;
- a coupon is invalid;
- checkout payment fails;
- a login password is wrong;
- a page does not exist.
Good error behavior should help the user recover.
“Something went wrong” without a next action is rarely enough.
12. Verify email delivery, not just WordPress notifications
WordPress can say a notification was triggered without proving it reached the inbox.
For critical workflows, verify delivery.
Examples:
- contact form notification;
- form autoresponder;
- password reset;
- new user email;
- WooCommerce new order;
- WooCommerce processing/completed order;
- booking confirmation;
- membership email.
Check:
- sender name;
- from address;
- reply-to address;
- recipient;
- subject;
- body formatting;
- links;
- brand presentation;
- spam/junk behavior where practical.
If SMTP or a transactional email service is part of the project, confirm the production credentials and sending domain are correct.
13. Add WooCommerce-specific QA for stores
A WooCommerce site should not be handed off based on a successful homepage review.
WooCommerce’s own documentation recommends testing store workflows such as product pages, cart, checkout, payments, shipping, taxes, order emails, and extension-specific functionality on staging before production changes.
For a new build, test the same business-critical flows.
Product and catalog
Check:
- product images;
- variation selection;
- attributes;
- sale pricing;
- stock status;
- SKU display if used;
- downloadable-product behavior;
- related/upsell products;
- category archives;
- filters;
- sorting.
Cart
Test:
- add to cart;
- update quantity;
- remove item;
- mini-cart;
- coupons;
- shipping estimates;
- empty cart;
- cart persistence where expected.
Checkout
Test:
- guest checkout;
- account checkout;
- required fields;
- billing/shipping address logic;
- validation;
- taxes;
- shipping methods;
- coupons;
- terms checkbox;
- payment method switching;
- failed payment;
- successful payment.
Order lifecycle
Verify:
- order appears in admin;
- correct status is assigned;
- inventory changes correctly;
- customer email sends;
- admin email sends;
- payment gateway transaction matches;
- webhook/integration behavior works;
- fulfillment integration receives expected data where applicable.
WooCommerce notes that test orders can trigger emails and appear in analytics, and recommends safe testing on staging. Account for those side effects when planning QA.
Production verification for ecommerce
After launch, verify enough of the live stack to confirm that:
- production credentials are active;
- live webhooks are connected;
- taxes/shipping rules are correct;
- transactional email sends;
- caching does not break cart/checkout/account behavior.
Use an appropriate low-risk live verification method agreed with the client. Do not casually place real transactions without knowing how fulfillment, tax, inventory, accounting, email, and analytics systems will treat them.
14. Review security and operational basics before handoff
A QA checklist is not a penetration test.
Still, basic operational checks belong before transfer.
Verify:
- HTTPS works;
- mixed-content warnings are resolved;
- unnecessary admin accounts are removed;
- temporary contractor accounts are reviewed;
- each client user has the correct role;
- shared default admin credentials are not being handed around;
- backups exist;
- restore responsibility is documented;
- core/theme/plugin update ownership is defined;
- premium plugin licenses are documented;
- staging access is controlled;
- debug mode is not unintentionally exposed;
- obvious test content/logs are removed;
- forms have appropriate anti-spam controls;
- hosting/DNS/domain ownership is known.
WordPress Site Health can help identify configuration or update-related issues, but it should not be treated as a substitute for an actual security review when the contract requires one.
15. Run production verification after launch
A site that passed staging QA still needs a short production pass.
This should happen before the project is treated as fully handed off.
Verify:
- homepage resolves correctly;
- HTTPS works;
- www/non-www redirect behavior is correct;
- important URLs load;
- redirects work;
- forms send;
- email notifications arrive;
- analytics fires;
- conversion events fire;
- cookie/consent behavior works;
- sitemap uses the live domain;
- canonicals use the live domain;
- indexing settings are correct;
- critical integrations use production credentials;
- caching/CDN is not breaking pages;
- no obvious console errors appear on critical journeys;
- performance has not regressed badly;
- WooCommerce checkout/account exclusions from cache work where applicable.
This pass is intentionally smaller than the full staging QA cycle. Its purpose is to catch environment-specific failures.
16. Use a defect severity model before the final QA round
A checklist tells you what to test.
A severity model tells you whether you can release.
Here is a practical agency framework.
| Severity | Definition | Example | Handoff decision |
|---|---|---|---|
| Blocker | Prevents a critical business or user journey | Checkout cannot complete; site unavailable; forms fail completely | Do not hand off |
| High | Major approved functionality is broken or creates serious risk | Mobile menu unusable; CRM integration loses lead data; production is noindex | Fix before handoff |
| Medium | Defect is visible or inconvenient but has a workable path | One secondary layout breaks at a narrow width; non-critical email styling issue | Fix or obtain explicit acceptance |
| Low | Cosmetic or minor inconsistency with little operational impact | Small spacing inconsistency; minor text-wrap issue | May move to punch list if accepted |
This is not an industry standard. It is a usable internal decision model.
The important part is agreeing on the definitions before the final review.
Otherwise every issue becomes “urgent” because launch day is close.
17. Record QA evidence, not just checkmarks
A checkbox that says “forms tested” becomes almost useless two weeks later if nobody remembers which form, browser, recipient, or environment was used.
For important checks, keep a compact evidence record.
A useful QA item contains:
- check ID;
- URL/template;
- environment;
- browser/device;
- test action;
- expected result;
- actual result;
- pass/fail;
- screenshot or recording where useful;
- defect link;
- owner;
- retest status;
- reviewer;
- date.
You do not need this level of evidence for every 4px spacing adjustment.
Use it for higher-risk items.
Examples:
- payment flow;
- CRM integration;
- lead form;
- migration redirect;
- analytics event;
- consent behavior;
- membership login;
- booking;
- client CMS workflow.
This makes handoff easier because the agency can explain what was verified rather than saying, “We checked everything.”
The complete WordPress QA checklist before client handoff
Use this as the final operational checklist.
Scope and content
- Approved sitemap matches the site
- All required pages exist
- No unintended test pages are public
- Final copy is present
- Contact/business details are correct
- CTAs use approved wording and destinations
- Downloads work
- Footer/legal links work
- Placeholder content is removed
- Copyright information is correct
Visual and responsive
- Approved designs are represented accurately
- Shared components are consistent
- No horizontal overflow
- Headings wrap acceptably
- Buttons remain usable at narrow widths
- Images crop appropriately
- Sticky elements do not cover content
- Tables/forms remain usable
- Long-content states have been checked
- Empty/missing-content states have been checked
Browser and device
- Chrome tested
- Safari tested
- Firefox tested
- Edge tested
- iOS behavior checked where relevant
- Android behavior checked where relevant
- Critical templates tested across the agreed matrix
Navigation and links
- Header navigation works
- Mobile navigation works
- Dropdowns/mega menus work
- Footer navigation works
- Logo link works
- Breadcrumbs work
- CTAs go to the correct destination
- External links work
- Phone/email links work
- Pagination works
- 404 page works
- Broken-link scan reviewed
Forms and integrations
- Required-field validation works
- Error messages are understandable
- Success state works
- File uploads work where included
- Conditional fields work
- Spam protection works
- Notifications reach the correct inbox
- User confirmations send
- CRM records are created/updated correctly
- Expected field mappings are correct
- Automations trigger where included
- Failure/edge cases have been reviewed
WordPress CMS
- Client account tested
- User role is appropriate
- Client can edit normal copy
- Client can replace images
- Client can add/edit blog posts
- Custom post types work
- Custom fields work
- Required fields validate
- Preview works
- Draft/publish workflow works
- Admin area does not contain unnecessary test tools
- Site Health reviewed
SEO and indexability
- Live site is indexable where intended
- Staging remains blocked from indexing
- robots.txt reviewed
- Canonicals use production URLs
- XML sitemap works
- Sitemap uses production URLs
- Titles are present
- Meta descriptions are present where included
- Headings are sensible
- Internal links use live URLs
- Redirects work
- Key old URLs tested after migration
- Structured data matches visible content
- Search Console ownership/access handled where included
Analytics and consent
- Analytics base tag fires
- Key lead events fire
- Form conversion events fire
- Phone/email click tracking works where required
- Ecommerce events work where included
- Ad-platform conversion tags work where included
- Realtime/DebugView verification completed for important GA4 events
- Consent banner works
- Accept/reject/preferences behavior tested
- Consent state affects tags as intended
Performance
- Representative templates tested
- Mobile performance reviewed
- Desktop performance reviewed
- Major LCP issues reviewed
- Interaction delays reviewed
- Layout shifts reviewed
- Oversized images fixed
- Caching works where expected
- Third-party script load reviewed
- Launch baseline recorded
Accessibility
- Keyboard navigation checked
- Focus is visible
- Focus order is logical
- Sticky elements do not hide focus
- Forms have labels
- Errors are understandable
- Heading structure reviewed
- Images have appropriate alt treatment
- Color contrast reviewed
- Zoom/larger-text behavior reviewed
- Menus/modals are keyboard operable
- Accessibility statement/conformance wording matches the actual agreed test scope
WooCommerce, where applicable
- Product templates work
- Variations work
- Stock behavior works
- Cart works
- Coupon behavior works
- Checkout validation works
- Shipping rules work
- Tax behavior reviewed
- Test payment completed safely
- Failed-payment path reviewed
- Order status correct
- Customer emails send
- Admin emails send
- Inventory changes correctly
- Gateway/webhook integration works
- Live credentials verified after launch
Handoff and ownership
- Domain owner confirmed
- Hosting owner confirmed
- DNS owner confirmed
- Client admin access confirmed
- Premium license ownership documented
- Backup process documented
- Restore responsibility documented
- Maintenance ownership defined
- Training completed if included
- Documentation delivered if included
- Known issues/punch list accepted
- Final approval owner recorded
- Support period and bug-fix boundary documented
What agencies get wrong with website QA
1. Starting QA only when the client asks to see the site
By that point, the agency is testing under deadline pressure.
Run internal QA before client review.
The client should not be the first person to discover that the mobile menu fails or the form goes nowhere.
2. Treating QA as a design review
A site can be visually accurate and operationally broken.
Test workflows, CMS editing, tracking, integrations, and production configuration.
3. Testing only the homepage
Shared components reduce repetition, but unique templates still create unique risk.
Build your test plan around templates and critical journeys.
4. Testing only happy paths
A successful form submission tells you nothing about validation, API failure, file limits, or duplicate submissions.
Test failure behavior where the feature matters.
5. Running automated tools and calling it complete
Crawlers, Lighthouse, accessibility scanners, visual diff tools, and link checkers are useful.
They do not know the client’s business requirement.
Automation should find patterns. Human QA should verify intent.
6. Chasing perfect performance scores
Google explicitly advises thinking about overall page experience rather than focusing on a single score.
A perfect lab number is not the same as a dependable user experience.
7. Treating accessibility as an automated score
A scanner cannot tell you whether a keyboard journey is logical, whether focus gets trapped, or whether a custom interaction is understandable.
Manual review is still necessary.
8. Forgetting to test the WordPress editor
The client does not only receive the front end.
They receive a CMS.
If editing normal content breaks the website, the handoff is incomplete.
9. Testing analytics on staging and never checking production
Environment changes matter.
Verify important events on the live domain after launch.
10. Having no launch-blocker definition
Without a severity model, teams either delay launch for cosmetic issues or launch with serious defects because “we still have a few bugs.”
Define the rule first.
A practical QA implementation process for agencies
A good process is repeatable enough that a different PM or developer can run it next month.
Step 1: Build the QA matrix during scoping
Before development ends, define:
- templates;
- journeys;
- supported browsers/devices;
- integrations;
- accessibility requirement;
- analytics events;
- ecommerce flows;
- acceptance criteria.
Do not invent the QA plan the night before launch.
Step 2: Freeze the review build
Choose the staging build or deployment version being tested.
If developers keep changing code while QA is running, test results become unreliable.
For smaller teams, a strict freeze may be impractical. At minimum, log meaningful changes and retest affected areas.
Step 3: Run internal QA
The person reviewing should ideally not be the same person who built every detail.
Fresh eyes find different problems.
Record defects with enough context to reproduce them.
Step 4: Triage defects
Assign:
- severity;
- owner;
- target fix;
- retest requirement.
Separate defects from change requests.
Step 5: Retest fixes
Do not assume “developer says fixed” means verified.
Retest the original reproduction steps.
For higher-risk fixes, also check nearby behavior for regression.
Step 6: Run client acceptance
Give the client a bounded review period and a defined feedback channel.
Avoid receiving separate feedback by Slack, email, Figma, Loom, WhatsApp, and phone with no consolidation.
Step 7: Launch with rollback awareness
Know:
- who controls DNS;
- who deploys;
- where the backup is;
- how to revert;
- which integrations use live credentials;
- who makes the final go/no-go decision.
Step 8: Run production verification
Use the smaller live checklist described earlier.
Step 9: Capture handoff evidence
Save:
- final QA checklist;
- known accepted issues;
- production verification record;
- account/ownership notes;
- support boundary;
- approval.
Now the agency has a clean closeout record.
How white-label production changes the QA process
White-label delivery adds one extra requirement: QA ownership must be explicit.
An agency may handle:
- client communication;
- design approval;
- content;
- SEO;
- analytics;
while the production partner handles:
- WordPress development;
- responsive implementation;
- CMS;
- forms;
- integrations;
- technical QA.
If responsibilities are not written down, both sides may assume the other is testing the same thing.
A useful split is:
Production partner owns: implementation QA against the supplied scope.
Agency owns: client-facing content approval, business accuracy, and final acceptance.
Shared: launch-critical integrations, SEO migration, tracking, accessibility requirements, and production verification where those areas cross both teams.
Softvole works only with agencies as a white-label production partner, so a checklist like this is most useful when it is attached to the project brief and ownership is decided before the final week. The agency should still control the client relationship and final approval process.
Frequently Asked Questions
What is a WordPress QA checklist?
A WordPress QA checklist is a structured test plan used to verify that a WordPress website meets its approved functional, visual, technical, content, and operational requirements before launch or handoff. It usually covers responsive layouts, browsers, forms, links, CMS editing, SEO, tracking, performance, accessibility, integrations, and production readiness.
When should website QA happen?
QA should happen throughout development, with a formal internal pass before client review, a full pre-launch pass on the release candidate, and a smaller production verification after launch. Waiting until the final day makes defects harder to distinguish from rushed changes.
What is the difference between QA and client acceptance testing?
QA is the delivery team’s process for verifying that the website meets defined requirements. Client acceptance is the client or agency decision-maker confirming that the delivered result is acceptable. Client review should not replace internal QA.
Which browsers should agencies test WordPress websites in?
There is no universal browser list for every project. Many agencies test current stable Chrome, Safari, Firefox, and Edge plus relevant iOS and Android browsers. The final matrix should reflect the client’s audience, contractual requirements, analytics history, and feature risk.
Should every page be manually tested?
Not every check needs to be repeated on every page. Test shared components across representative templates, then give extra coverage to unique layouts, high-value pages, forms, ecommerce flows, migrations, and custom functionality. Content review and broken-link scanning may still require broader site coverage.
Is a high Lighthouse or PageSpeed score enough for QA?
No. Performance testing is only one part of website QA. Lighthouse cannot confirm that CRM leads arrive, checkout completes, the client can edit content safely, redirects are correct, analytics events fire, or a keyboard user can operate custom components.
Should accessibility testing be part of every WordPress QA process?
Basic accessibility checks should be part of good website QA, but the depth of testing should match the agreed requirement. If the project claims WCAG 2.2 Level AA conformance, the agency needs a defined testing process that goes beyond automated scanning.
What should be handed to the client after QA?
At minimum, the client should receive the agreed website access and a clear record of ownership and support responsibilities. Depending on scope, handoff may also include a QA summary, accepted punch list, documentation, training, license information, backup details, analytics access, and maintenance instructions.
Conclusion
A reliable WordPress QA checklist is not a giant list of technical rituals.
It is a release decision.
The agency defines what “done” means, tests the site against that standard, records meaningful defects, retests fixes, verifies the live environment, and transfers ownership with fewer unanswered questions.
The strongest QA processes also test the parts clients interact with after launch: the WordPress editor, tracking, notifications, account roles, backups, and ongoing ownership.
If your agency handles strategy, design, SEO, or client management but needs another team to handle WordPress production and implementation QA behind the scenes, Softvole can fit into that delivery model as a white-label production partner. The useful starting point is still the same: one agreed scope, one QA standard, and clear ownership of every launch-critical check.